Table of Contents
Halloween witch decor
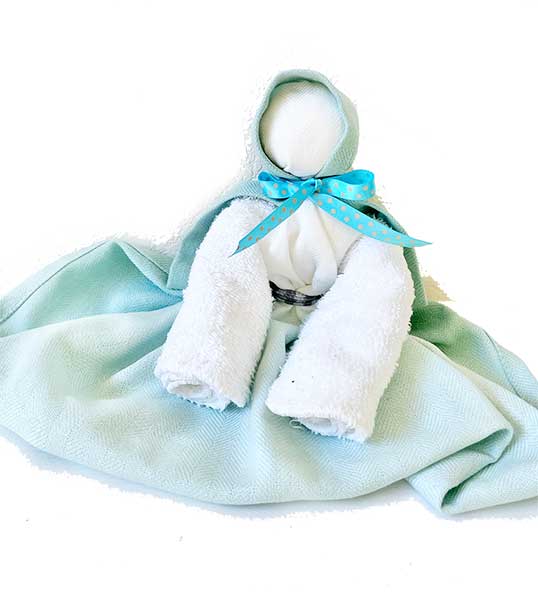
Here are Halloween witch craft ideas using fabric, Handkerchiefs or Kitchen towel.
1. How to make Halloween Witch with Handkerchief
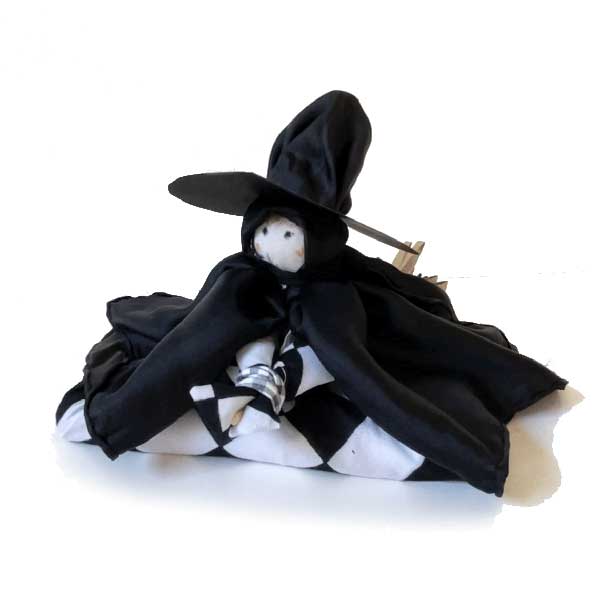
How to make witch at home using handkerchiefs
Total Time: 7 minutes
Witch broom: Step 1
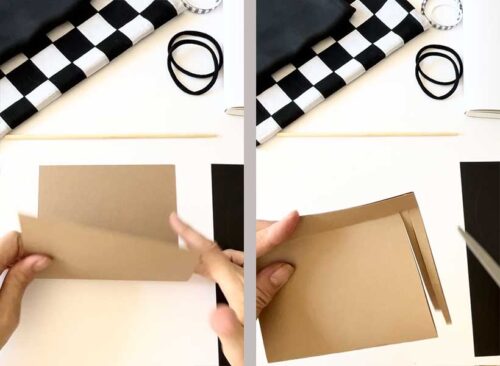
Cut brown construction paper in half (8.5″ x 5.5″ for letter size) and fold it in half to make 4.25″ wide.
With the loop side down, make thin slits leaving 1 inch from the top.
Witch broom: Step 2
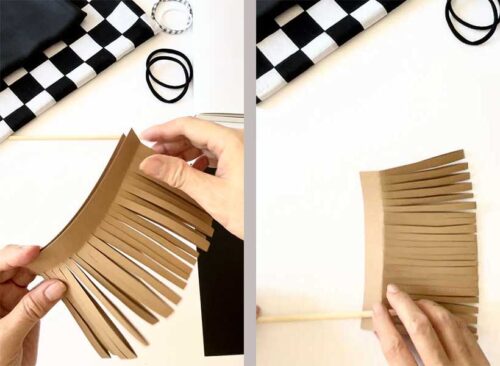
Wrap a chopstick tightly around the paper.
Witch broom: Step 3
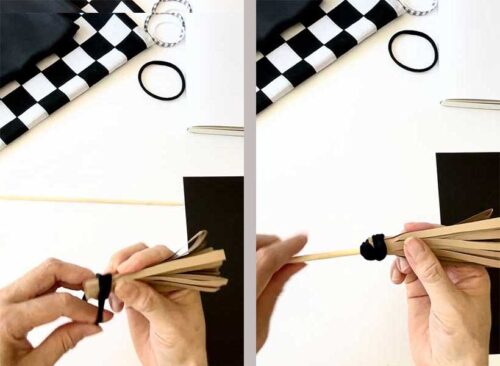
Once remove the chopstick and wrap the rolled paper with an elastic band.
Put the chopstick back and slide the elastic between the chopsticks and the rolled paper to hold it in place so that it does not move. (You can also use a hot glue gun or wood glue when rolling, instead.)
Witch Hat
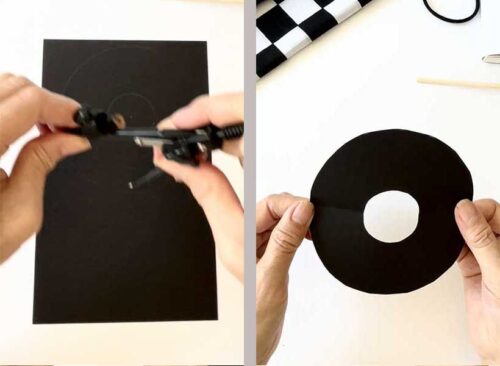
Draw two circles with a compass on a black construction paper, one 5″ and the other 1.5″ in diameter.
Fold in half and cut along the line with scissors.
This loop becomes the brim of the hat.
(The size of the circle depends on the fabric used. It may be necessary to adjust the size of the small circle at the end of the entire process.)
Witch: Step 1
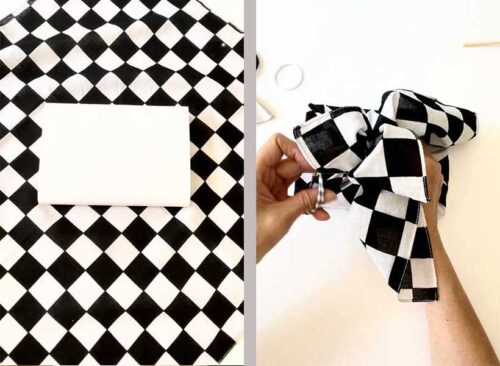
Spread the cloth flat and place the book diagonally in the center.
Grasp all four corners and tie with elastic.
Witch Step 2
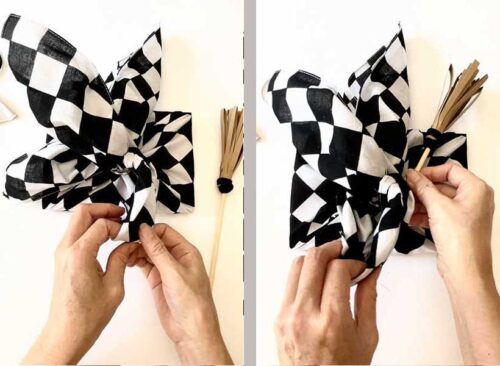
To make arm, select a short corner and fold it in thirds to make it thinner.
Fold it inward about an inch from the tip to make a hand.
Do the same with the other arm. Put both hands together, place the broom between them, and tie the hands and broom together with an elastic band.
Witch Step 3
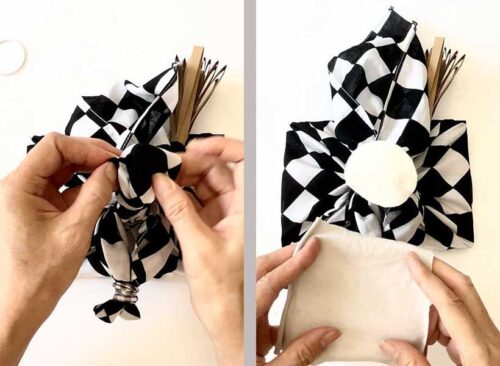
Take one of remaining corner (closed to you) and make a loosen knot to form the base of face.
Place a cotton pad on top of it and cover it with the stretchy cloth.
Witch Step 4
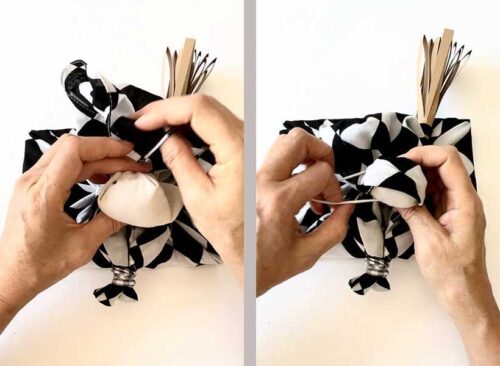
Shape it round, take the other corner, fold the tip over and cover the face, and tie the face and corner together at the neck with an elastic band.
Witch Step 5
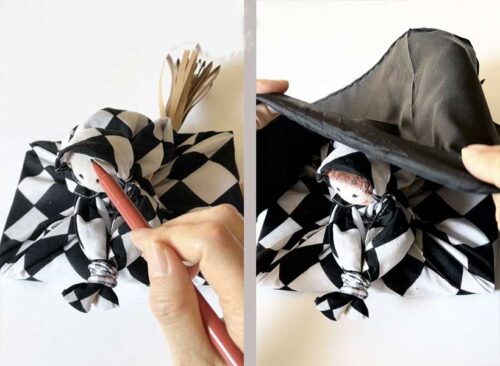
Draw eyes and front hair with color pens.
Put a black cloth over the head.
Witch Step 6
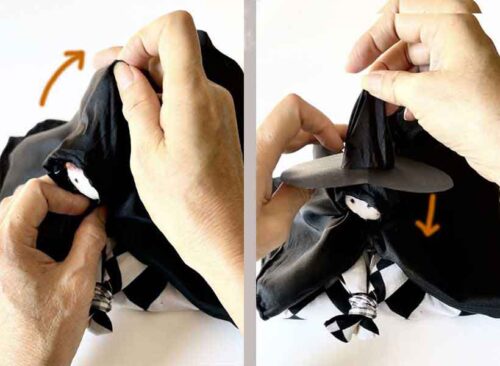
With room above the head, tie the neck with an elastic band.
Put the brim of the hat through it and your witch is completed.
Tools:
- Scissors
- Pencil compass
- Color pens for drawing eyes and hair
Materials: 2 handkerchiefs (one to wrap a book, the other to make a hat and cape) for scarf 5 Elastic bands (hair elastic is preferred) Brown Construction paper (for witch broom) Black Construction paper (for witch hat) Chopstick Stretchy scrap of cloth for face (Old T-shirt works well.) Cotton pad Something to wrap, such as book
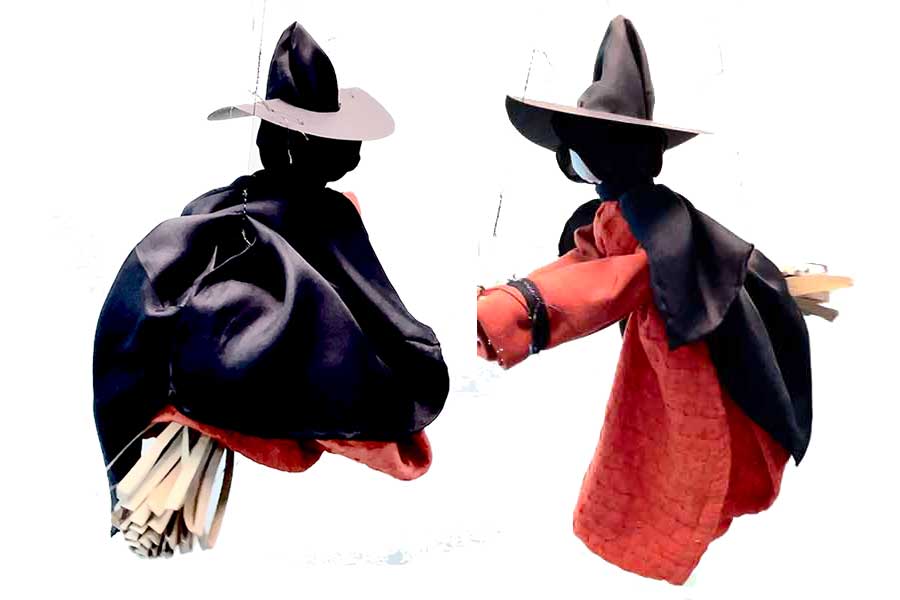
2. Witchy home decor -How to make Halloween Hanging Witch
Here is how to make hanging witch using kitchen towel, napkin, and black pocketchief.
This hunging witch is larger than the witch above but some of materials are almost same.
Materials:
- Kitchen towel
- Napkin (for arms)
- Black pocketchief
- 5 Elastic bands (hair elastic is preferred)
- Brown construction paper (for witch broom)
- Black construction paper (for the brim of the hat)
- Chopstick (12″ or more), or bundled long bamboo skewers
- Stretchy scrap of cloth (such as old-T-shirt) for face
- String for hanging witch
Tools
- Scissors
- Pencil compass
- Color pens (for drawing face)
- Needle
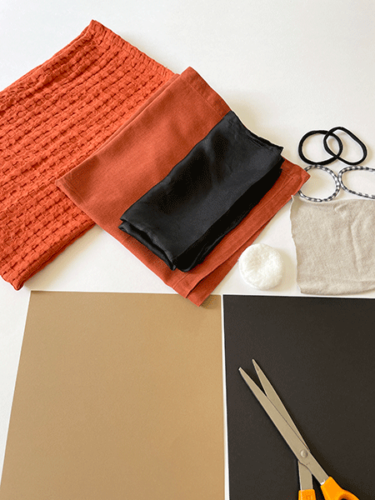
Step 1. Broom
Fold a sheet of brown construction paper in half.
Make a thin slit, leaving 1 inch from the top, with the looped part down.
(The only difference from the witch’s broom above is the length.)

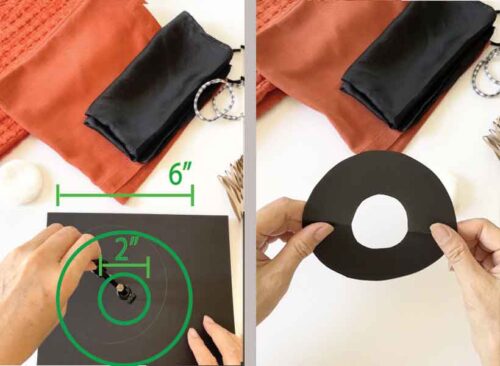
Step 2. Witch hat brim
Draw two circles with a compass on a black construction paper, one 6″ and the other 2″ in diameter.
Fold in half and cut along the line with scissors.
Step 3.
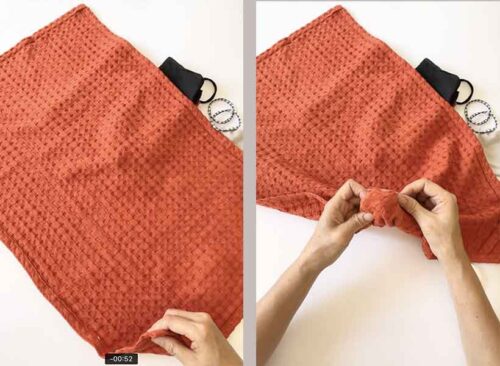
Place the kitchen towel with wrong side facing up.
Take one corner and roll it up to the size of a meatball.
Step 4
Place a cotton pad on top of it, cover with a piece of cloth, and tie with an elastic.
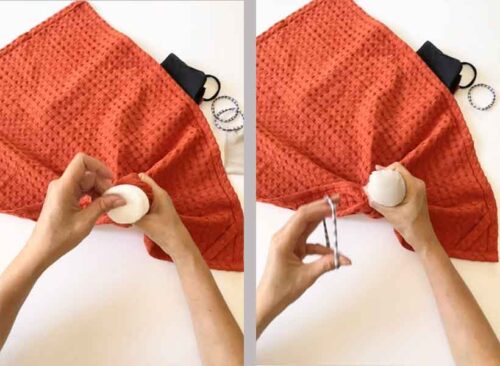
Step 5
Draw face with color pens.
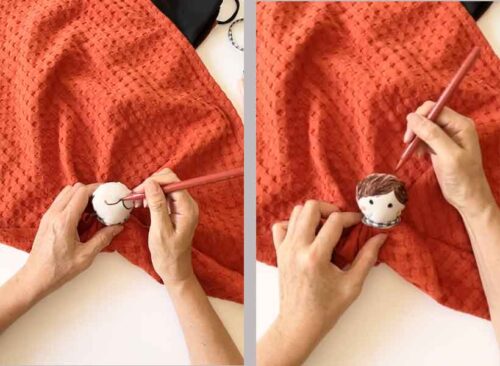
Step 6
Take the diagonal corner, and hold it with the head in a position that the corner is about 1 inchi above the head. Tie them with an elastic around her neck.
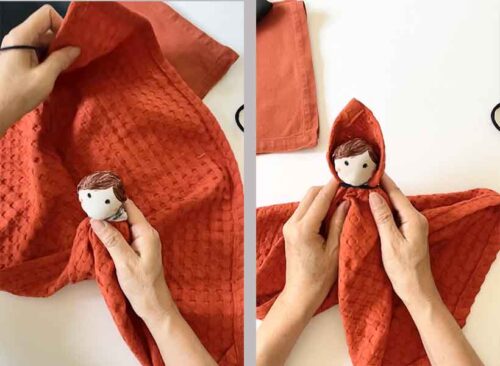
Step 7
The napkin is going to be her arms.
Fold the sides of the napkin inward to make it 12 to 13 inches wide, and roll it tightly.
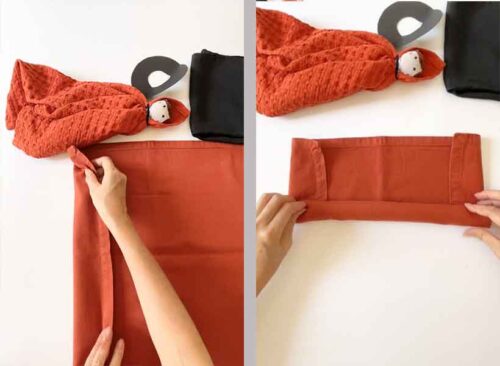
Step 8
Put the rolled napkin through the body and tie with an elastic (or ribbon) around the abdomen.
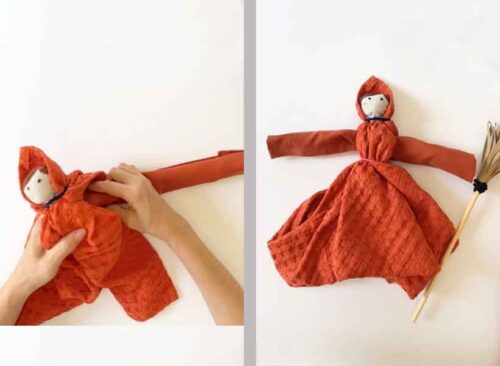
Step 9
Tie the arms and broom handle together with an elastic.
Spread the skirt and place the broom in the middle of it.
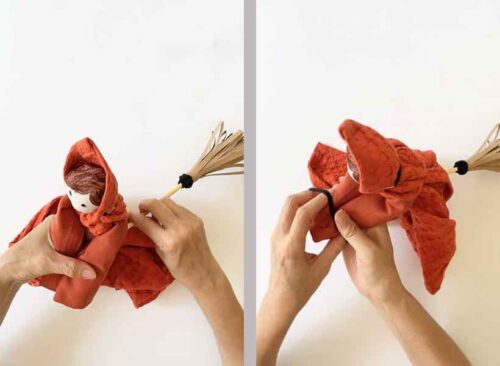
Step 10
Tie the arm at the end of the string and the broom at the other end of the string.
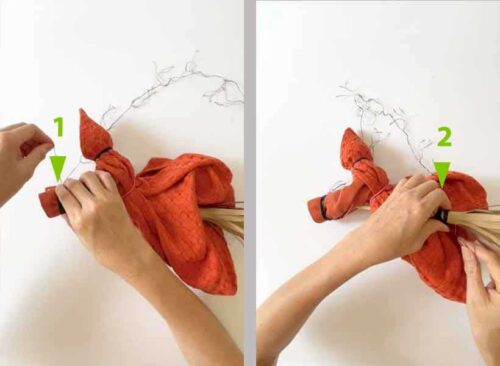
Step 11
Cover the head with a black cloth with room above the head.
Put the brim of the hat through it.

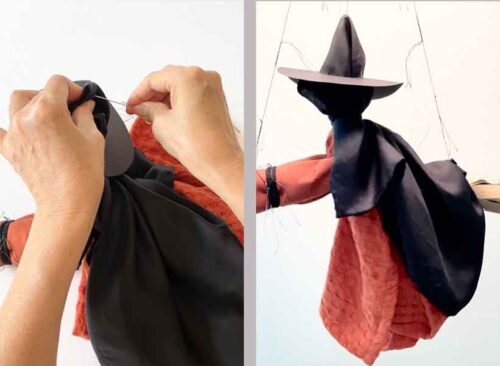
Step 12
Stick a needle into the hat and the tip of kitchen cloth.
Tie this string to the string in step 10 and your hanging witch is ready!
The concept of this site is not to cut or use glue so that the cloth can be reused and recycled.
All the fabric squares used to make the witches can be reused for other purposes after Halloween is over.
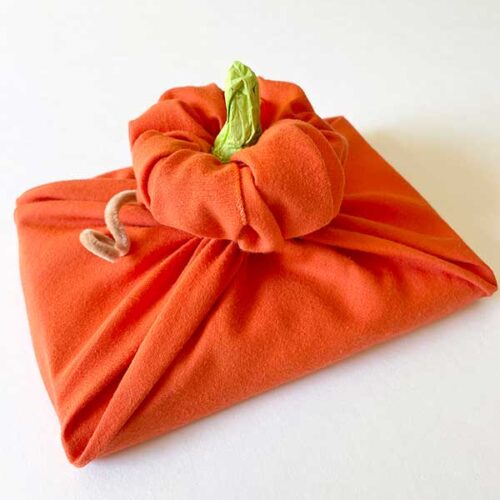
3. Halloween pumpkin craft wrapping and basket
Same napkins are used for these two halloween themed designs.
4. References:
- How to make wizard hat for kids
- Broom craft for outside
- How to make a witch hat
- Costume diy witch
- How to make witch hat in any size
- How to make witch broom in minutes
Bloom craft for outside

